⚠️ ARCHIVE NOTICE ⚠️
This documentation is no longer being maintained!
- The new ArduSub docs are located in the ArduPilot wiki. Updated pages will be redirected.
- The Companion Computer Software is also archived, and has been replaced by BlueOS.
- For Control Station Software, see QGroundControl or Cockpit (our new alternative).
Building a Vehicle Frame
Frame Selection
The first step in building an ArduSub vehicle is to pick a vehicle "frame" from which to mount and orient thrusters. Some frames use less thrusters, while others have better manueverability (strafe, pitch/roll stability).
ArduSub includes a high-level motor library that can configure motors in any configuration. This library is used to implement a number of supported frame configurations.
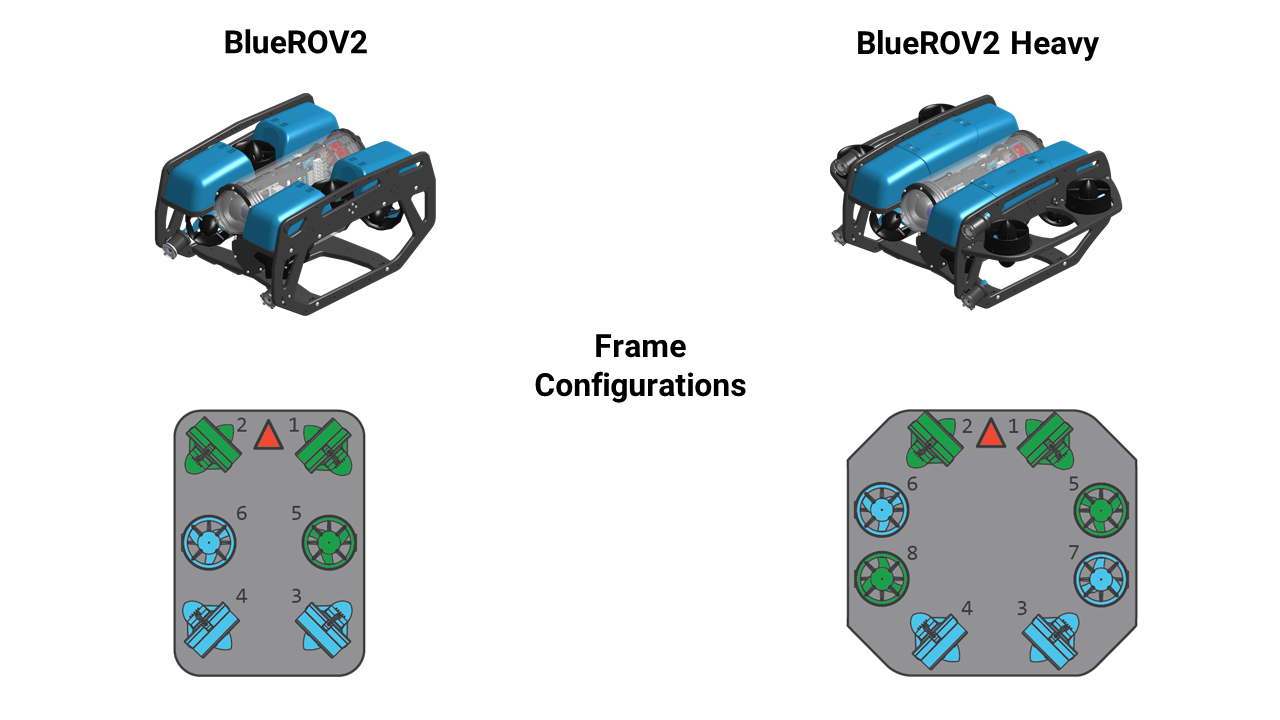
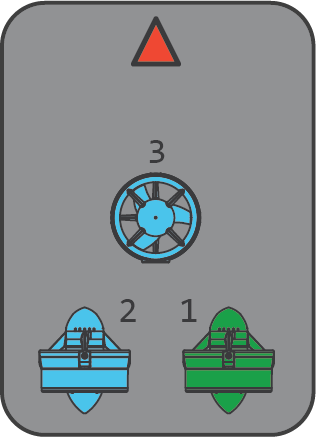
All configurations are shown from top-down view. Green thrusters indicate counter-clockwise propellers and blue thrusters indicate clockwise propellers (or vice-versa). The numbers next to each thruster correspond to the numbered main output on the autopilot board when the ESC signal wires are plugged in.
Currently supported are:
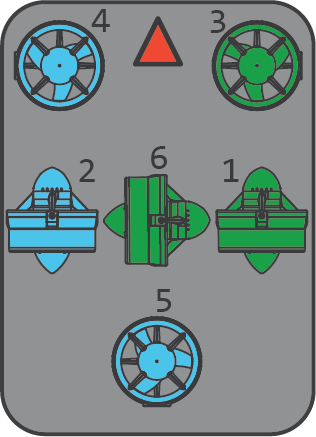
BlueROV1 Configuration with 6-DOF thruster positioning. (Frame: |
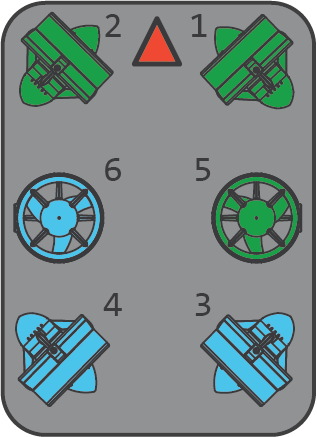
Vectored ROV with side-by-side vertical thrusters. Used for the BlueROV2. (Frame: |
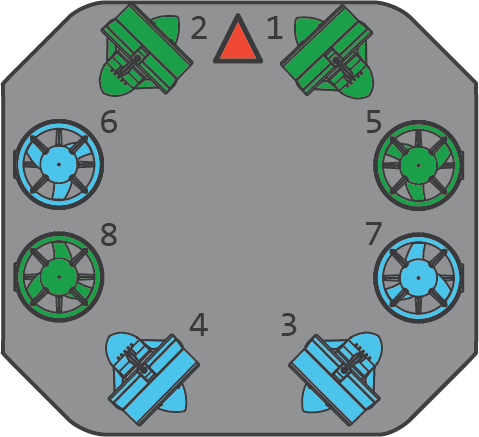
Vectored ROV w/ Four Vertical Thrusters, an 8-thruster configuration with 6-DOF control and heavy-lifting capacity. Used for the BlueROV2 Heavy. (Frame: |
ROV with a single vertical thruster. (Frame: |
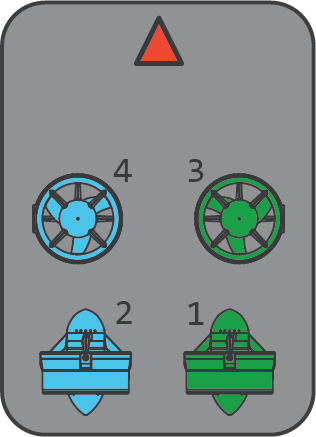
ROV with side-by-side vertical thrusters. (Frame: |
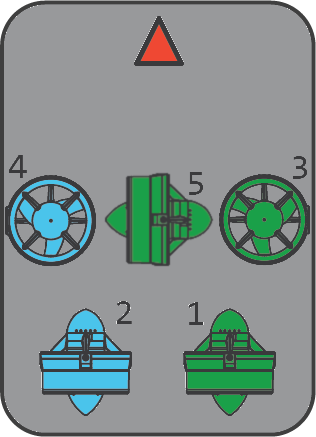
ROV with a lateral thruster and side-by-side vertical thrusters. (Frame: |
Custom Frame
If the vehicle thruster configuration a user wishes to build is not one of the pre-build frames, then a custom frame may be configured in using this documentation: Making a Custom Configuration
Component Selection
The minumum required electronic components can be found in the Hardware Options: Required Hardware section of this documentation book.
Vehicle frames are commonly built out of corrosion resitant material such as HDPE and aluminum.
Wiring and Connections
The exact wiring configuration depends on the vehicle configuration and the hardware used. The following are the standard channel assignments. Please see the "Frame Selection" for standard thruster numbering.
The MAIN and AUX output numbers reference the Pixhawk 1 PWM outputs.
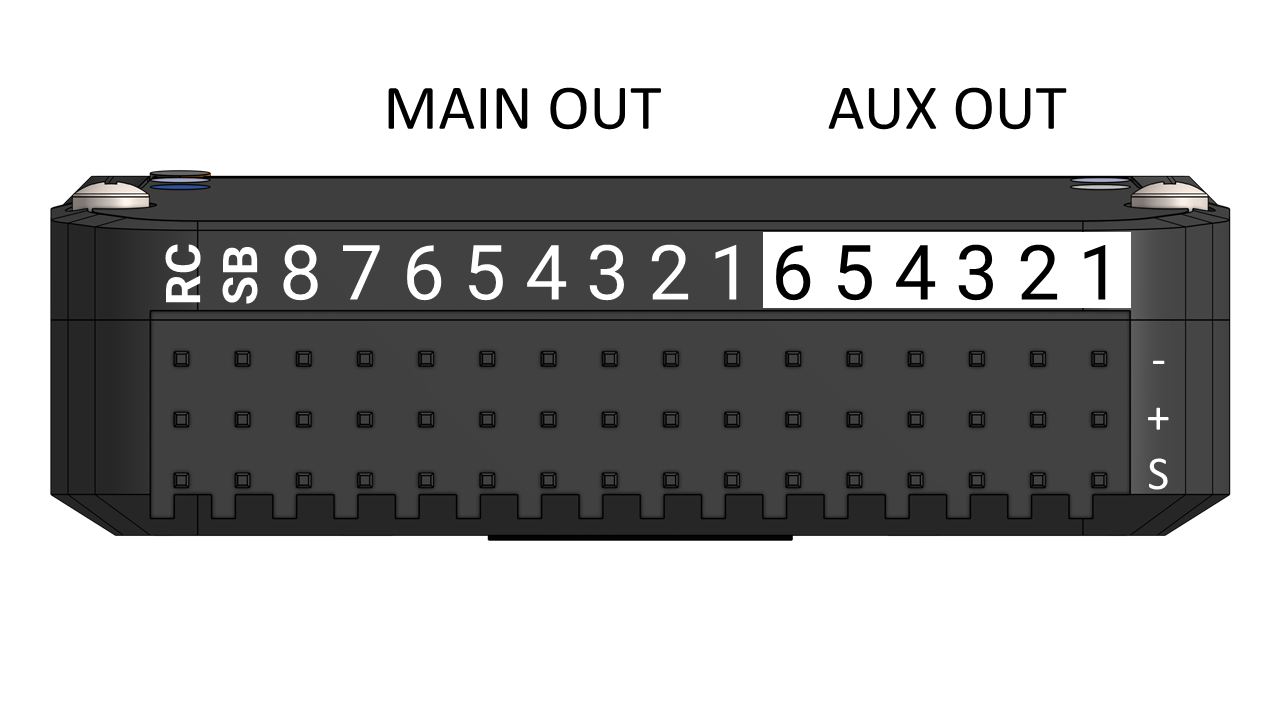
| PWM Channel | Connection |
|---|---|
| MAIN OUT Channel 1 | Thruster #1 |
| MAIN OUT Channel 2 | Thruster #2 |
| MAIN OUT Channel 3 | Thruster #3 |
| MAIN OUT Channel 4 | Thruster #4 (if used) |
| MAIN OUT Channel 5 | Thruster #5 (if used) |
| MAIN OUT Channel 6 | Thruster #6 (if used) |
| MAIN OUT Channel 7 | Thruster #7 (if used) |
| MAIN OUT Channel 8 | Thruster #8 (if used) |
| User Configurable (MAIN or AUX) | LED Lights |
| User Configurable (MAIN or AUX) | Camera Tilt Servo |
The hardware also has other input/output ports including I2C and serial ports. These are the recommended connections for those ports.
| Port | Connection |
|---|---|
| I2C | Pressure sensor (MS58XX) |
| USB Serial Port | Companion computer (if used) |
| Power Port | Power Module |
Reference Frames
If deciding on which components to use is too daunting for first time builders, Blue Robotics sells the BlueROV2 which may be used as a semi-complete "reference frame" from which to understand the ArduSub control system, with some additional output channel assignments. Components can be reused and reconfigured for custom frame designs.